
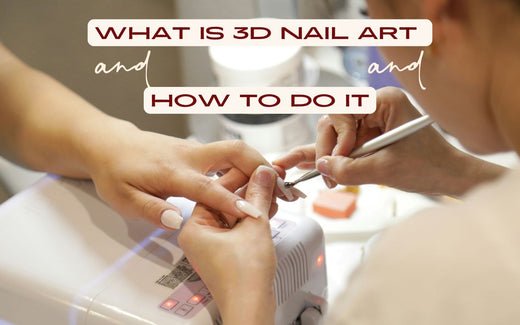
3D Nail Art: What Is It and How to Do It
Eileen YHey Beauties! First thing first, we hope everybody has a good start in 2025! Believe me, the world is changing right now, in the new world of nail fashion, 3D press-on nails are captivating a growing number of consumers who value individuality and convenience. Also, this innovative nail trend not only breaks through the limitations of traditional nail art but also offers modern women a quick and stylish way to change up their nail looks. We’ve boldly predicted the 2025 nail trends (for more details, check here), and 3D nail art is definitely one of them. If you’re new to press-on nails, you might be wondering what 3D nails are and how to make 3D nails at home. Don’t worry, I’ll walk you through it step by step!

Definition and Concept
3D nail art is a nail design technique that focuses on sculptural details to create eye-catching, textured looks. The core of 3D nail art lies in skilled craftsmanship, often using acrylics to sculpt intricate flowers, geometric shapes like water drops, or unique designs such as hearts, stars, or even butterflies. These designs are then enhanced with embellishments like rhinestones, gems, bows, pearls, or metallic accents to add dimension and luxury.
Key Benefits of 3D Press On Nail Art
1. Time-Saving and Convenient: Achieve a salon-quality 3D nail art look in minutes and easily apply them at home or anywhere without the hassle of appointments or lengthy application processes.
2. Budget-Friendly Beauty: Let’s be real—salons can be pricey. Press-ons give you the same gorgeous look without draining your wallet. You can save from approximately R3,144 up to R7,572 Each Year!
3. Reusable and Durable: High-quality 3D press-ons are made with durable materials, allowing for multiple uses with proper care.
4. Eco-Friendly Options: LuxeCharm's press-ons, for example, are crafted with eco-friendly PMMA material, making them a sustainable choice. Also, Unlike factory packs with unused sizes, our custom-sized press-on nails fit perfectly every time—no waste, just flawless nails!
Learn more about LuxeCharm Press On Nails down below
Popular 3D Nail Art Trends
1. 3D Ombre nail Designs: Ombre enhanced with Sculpted flowers, water drops.

Sunset Mirage
389.0 ZAR
Introducing Sunset Mirage, our 3D press on nails capture the beauty of a coastal sunset with Sunset Mirage. These medium-almond nails feature a warm blend of orange, yellow, and blue, enhanced with 3D sculpted flower petals and detailed water-drop accents.
2. Rhinestone Accents: Sparkling crystals for a touch of glam.


3. Fruity Vibes: Delightful fruit 3D nail designs that pop— Sculpted with acrylic for rich texture and depth, these fruity accents add a fun, eye-catching twist to your style.


Materials You’ll Need for 3D Nail Art

Basic Supplies:
- Nail polish (base coat, color coat, and topcoat).
- Acrylic gels and liquid or gel polish.
- Nail art brushes and sculpting tools.
- UV or LED lamp (for gel polish).
3D Embellishments:
- Rhinestones and pearls.
- Mini charms, bows, or beads.
- Glitter and metallic powders.
Optional Extras for Advanced Art:
- Colored acrylic powders for sculpting.
- Nail stamping kits for layered designs.
- Decals to enhance your art.
Having the right materials ensures a smooth application and professional finish.
To achieve 3D nails, prep your nails with a base color, then start by sculpting your chosen design with acrylics and liquid on the nail surface, then using sculpting tools to shape the designs. Once cured, carefully place your embellishments using nail glue or gel for a long-lasting hold.secure everything in place, and finish with a glossy topcoat for that “wow” effect. The combination of sculpted details and decorations creates a stunning, statement-making manicure.
Okay, I know it seems like a lot of work here, but bear with me, it is not as complicated as it looked. After all, it takes some effort to become charming and you need to practice to strengthen your skill and patience to pull it off. So here come the DIY nail tutorials:
Step-by-Step Guide: How to Create 3D Nail Art
Whether you’re new to DIY nails or have tried a few times, I’ve got you covered with the right steps to create stunning 3D nails! In this guide, I’ll not only show you how to nail the technique but also share some tricks and mistakes that no one tells you about—so you can avoid the common pitfalls and achieve flawless results!
Step 1: Prep Your Nails
1. Clean your nails thoroughly to remove oils and residue.
2. Shape and buff your nails for a smooth base.
3. Apply a base coat to protect your natural nails.
Step 2: Choose and Apply Your Base Color
1. Pick a nail polish color that complements your 3D design.
2. Apply 1-2 coats and allow them to dry completely (or cure if using gel).
Step 3: Sculpt the 3D Designs
1. For Acrylic Designs:
- Mix acrylics and liquid to create a moldable paste.
- Use a sculpting tool to shape designs directly onto your nails (e.g., flowers, bows, or swirls).
- Allow the acrylic to harden.
2. For Gel Designs:
- Apply gel polish in layers to create raised shapes.
- Cure each layer under a UV/LED lamp.
Step 4: Add Embellishments
1. Use nail glue or gel to secure rhinestones, pearls, or charms.
2. Position embellishments carefully using tweezers or a dotting tool.
3. Cure under the UV/LED lamp if using gel.
Step 5: Seal with a Topcoat
1. Apply a clear topcoat to lock in your design and add shine.
2. Cure or allow it to dry completely for a flawless finish.
It’s totally worth the effort when you see the final masterpiece!
Pro Tips for Perfect 3D Nail Art

1. Start Simple: Begin with basic designs like dots or small flowers.
2. Use Quality Products: High-quality acrylics, gels, and embellishments last longer.
3. Invest in Good Tools: Precise brushes and tools make all the difference.
4. Practice Makes Perfect: Experiment with designs to improve your technique.
5. Maintenance: Handle nails gently and avoid harsh chemicals.
6. Cure Every Layer: For steps involving acrylics, always use a UV lamp to fully cure each layer. This ensures durability and prevents smudging.
Common Mistakes to Avoid
Even with the best intentions, mistakes can happen. Avoid these pitfalls:
1. Using Too Much Glue or Gel: This can create a bulky appearance.
2. Overloading Designs: Too many embellishments can make nails impractical.
3. Skipping Proper Drying/Curing: This may lead to smudging or poor durability.
4. Choosing Low-Quality Products: Inferior materials don’t last and may look cheap.
All above are the steps, tips, and common issues to avoid based on my experience. Of course, this isn’t an exhaustive guide, and there might be even more helpful ideas or solutions out there. If any of you have additional tips or ways to avoid mistakes, feel free to share them in the comments below—let's help each other out!
For those who love the look without the DIY effort, press-ons are a great alternative.
Why Choose LuxeCharm?
LuxeCharm is a proud South African brand dedicated to bringing you salon-quality, eco-friendly, and reusable press-on nails that don’t compromise on style. Here’s why we stand out:
1. Locally Made, Globally Loved: As a South African brand, we understand what matters to our customers and strive to provide the best for you.
2. Sustainability at Its Core: Our nails are designed with the planet in mind, made from durable materials that can be reused—reducing waste and supporting your eco-friendly lifestyle.
3. Handcrafted Perfection: Each set is 100% handmade, ensuring every nail is a masterpiece with its own flair.
4. Fast, Reliable Delivery: No more long waits! We deliver within 3-10 days, so you can get your nails on time, every time.
5. Free Shipping on Orders Over R499: Shop without the added cost—enjoy free shipping on orders above R499!
With LuxeCharm, you’re not just buying press-on nails; you’re investing in quality, sustainability, and exceptional service.
To discover the difference craftsmanship and quality materials can make, click down below
Conclusion: Why 3D Nail Art Is the Best Choice
We’ve covered a lot about 3D nail art, from its eye-catching designs to the versatility it offers for every occasion. Whether you’ve tried DIYing your nails or you're just starting to explore the world of 3D press-on nails, the possibilities are endless. These nails provide stunning, textured designs, and with their easy application, you can achieve a high-end, salon-quality look at home.
Plus, with custom sizes and reusable designs, you save time and reduce waste! Whether you’re looking to try something new or find a perfect match, LuxeCharm offers eco-friendly, durable press-on nails that don’t compromise on beauty.
So, whether you're a DIY pro or new to press-on, why not check out LuxeCharm? We promise you won’t be disappointed!
Spin the Wheel to Win Up to 20% Discount!
Ending This Month!


 https://www.luxecharm.co.za/blogs/knowledgebase-press-on-nails